lifehacks
- How can I use the Raahu Kaal timings to plan my day effectively?
As someone who regularly checks Raahu Kaal timings, I've found it incredibly useful for planning my day. Anytime Astro's Raahu Kaal page provides accurate and updated timings for this inauspicious period each day. By avoiding important activities such as starting new projects, making financial decisions, or traveling during Raahu Kaal, I've experienced fewer obstacles and smoother outcomes. It's a simple yet effective way to align daily activities with favorable astrological periods.
- I hate soggy burritos.
Those channels give the burrito moisture somewhere to go so the tortilla stays dry. 👍
- Because these billboards are just monitors rotated 90 degrees, they’re invisible to polarized sunglasses. It’s like a real-life ad blocker!mas.to Ben Sandofsky (@sandofsky@mastodon.social)
Attached: 2 images Because these billboards are just monitors rotated 90 degrees, they’re invisible to polarized sunglasses. It’s like a real-life ad blocker!

- Use Salt to Revive Your Kitchen Sponge
For a seemingly humble cleaning supply, there has been a lot of discussion about sponges over the years; more specifically, how to clean or sanitize them. Various studies, like the one published in Nature’s Scientific Reports in 2017, found that kitchen sponges were teeming with bacteria—362 different types, to be exact—making them “the biggest reservoirs of active bacteria in the whole house,” including toilets.
But beyond the bacteria, sponges also tend to disintegrate and develop a foul odor with use. Fortunately, there’s a way to revive a worn-out sponge using a few pantry staples. Here’s what to know. How to revive old sponges with salt
So, why salt? Table salt is hygroscopic, which means it attracts moisture from the atmosphere, and is also the reason it can become damp and clog salt shakers in humid weather.
According to an article in House Digest, salt can also draw moisture from a sponge, reducing the dampness that bacteria need to thrive, and, in turn, preventing the growth of mildew and mold, as well as that foul odor kitchen sponges develop over time. And that’s not all: Salt can make the sponge more efficient, absorbing oils and making it easier to tackle stains.
There are two simple ways to put salt to work on your sponges:
- Saltwater soak
Rinse your sponge with warm water, then squeeze it out to get rid of any lingering crumbs or bits that may be sticking to it. Fill a container with warm water, and add 1/4 cup of salt (e.g. table salt, kosher salt, sea salt, etc). Stir the mixture until the salt is completely dissolved.
Next, place your sponge in the mixture, and make sure it’s fully submerged. Leave it there overnight, or at least for a few hours, then remove it, squeeze it out, and rinse it thoroughly with clean water.
- Add some vinegar
This process is the same as the one described above, except the mixture consists of 1 cup hot water, ½ cup white vinegar, and 3 tablespoons salt.
To clarify, the aim of these methods is to get rid of (or at least lessen) odors, and help get the sponge back to looking more like it did when it was new. We didn’t come across any research indicating that this would sterilize your sponge, so when you’re done, you may want to pop it in the microwave.
- You Don't Need to Separate Your Laundry (With One Common Exception)lifehacker.com You Don't Need to Separate Your Laundry (With One Common Exception)
We learned to do laundry from our parents, but things are different now.
- How to Talk to Kids About the Fucked-Up State of U.S. Politicslifehacker.com How to Talk to Kids About the Fucked-Up State of U.S. Politics
Because critical thinking and bullshit detection are no longer luxuries; they’re life-skills.

We’re a little more than a year away from the 2024 presidential election, and if you think things are ugly and crazy now, just wait a few months. We’re more ideologically divided nation than even before, and it’s partly by design. Fear and hatred are the keys to winning modern elections, so count on strategists and politicians to find exciting new ways to inject rhetorical poison directly into the cultural mainline.
If you chose to bring children into this world, you have a responsibility to help them contextualize and understand the disheartening political moment we are trapped within. Critical thinking and bullshit detection are no longer luxuries; they’re life-skills, and you should help your children develop them, if only to make the future electorate less batshit crazy. Below are some tips that might help you help your child understand what’s going on and not be driven too crazy by it. Be open to the conversation
For many, it’s easier to talk about sex with our children than it is to talk about politics. Kids can pick up on that reluctance and might not bring up their fears and concerns about current events, so you should make a conscious effort to broach the subject. Set aside some quiet time, and ask open questions like, “Who do you think should be president?” Then let them answer. Try not to steer the conversation toward your beliefs or argue. It really doesn’t matter what an 8-year-old thinks about politics—the point is for them to reflect and understand the world better. Keep things age-appropriate
Children at different ages understand the world in different ways. Younger children see the world in simplistic, absolute terms. They believe in rules, expectations, and are innocent enough to ask for justice instead of mercy. So you can explain an election by saying something like, “The person with the most votes wins, and that’s fair,” a reasonable explanation for a six year-old.
Older kids can (sometimes) grasp the nuances and contradictions in human endeavor. They can understand that compromise is necessary in public policy, and that no outcomes are going to be perfect. So you can explain an election by saying, “The person with the most electoral votes wins, and that’s not fair, but what are ya gonna do?” A reasonable explanation for a sixteen year-old. Be positive and reassuring
You might be freaking out about politics, but there’s nothing to be gained by scaring the children, so try to be comforting and positive, even if you’re not feeling that way. I’m not suggesting you lie, but both parenting and politics require message discipline. The goal is to raise a child who feels comfortable in the world, and filling them with your fears does not achieve that. So massage the truth a little. If your child says, “I’m worried that Trump will be re-elected,” don’t respond with, “Right? We’re all going to die!” Instead, say, “I’m a little worried too, but it’s only for four years.” Take a long view
When trying to contextualize current events for your child, it’s easy to fall into apocalyptic thinking—these are weird, ugly times after all—but remember that there have been weirder, uglier times. Like The Civil War. Or the Reconstruction. Or the period after The Reconstruction. Or the Great Depression. Or World War II, and on, and on. Our nation has been poised on the brink of collapse regularly, but it never quite topples over. And if the Jenga tower of American democracy really is about to hit the floor, your 9-year-old can’t do anything about it, so try to tie current events to historical events they’re learning about in History class. There’s something reassuring about the constancy of chaos in public life. Separate the signal from the noise
It’s easy to get stuck in the daily outrage of political coverage, but almost all of the culture-war rhetoric we engage with is less meaningful than laws that are passed nationally and locally. So steer conversations with kids toward public policy instead of politics. Discuss the broad strokes: Why we have the laws we have. Who made them. Who enforces them. Explain what voting is and how the government is structured and works. (You might need to do some research for this.) Don’t demonize people you disagree with
It’s good to let your children know how you feel about politics (in an age-appropriate way of course), but try to avoid demonizing people who disagree with you, especially if they’re relatives. How two decent people can have opposing views about politics can be baffling to children (and adults), but don’t explain it away by saying, “They’re just stupid.” (Even if they’re stupid.) Try something like “We don’t agree about everything” instead. Your brother-in-law who’s flying a Trump 2024 flag will still be at Thanksgiving, so try to model polite interaction despite ideological differences. Teach your children to think about media critically
If a political ad pops up on YouTube or TV, don’t immediately turn it off. Use it as a lesson on media literacy, and talk about the messages you’re receiving. Try to get them to think critically about what is behind it. Discuss who made it and why. Discuss the tactics used—is it trying to scare people? Inform them? Persuade them? Are the claims it makes true? The idea is to actively question propaganda, no matter its source, and create a person who doesn’t let media wash over them. Let your children see you engage in politics
If you want your child to grow up to be a good citizen, you have to model good citizen behavior. So engage in politics in a meaningful, positive way. If you really hate a guy running for mayor, volunteer to phone bank for the opposition instead of complaining. Put a sign on your lawn. Have family political discussions regularly. Discuss how your own value system lines up with your political views. Discuss how you came to hold the views you have and where your values come from.
- Carbonating tap water to make seltzer is easy, fast, and absurdly inexpensive
This guy's project is tremendous:
"Carbonating tap water to make seltzer is easy, fast, and absurdly inexpensive with my improvised apparatus. All that is required is to place CO2 gas in agitated contact with chilled water for a few seconds. In this essay, I'll show you how it is done with easy-to-find parts and common PET soda bottles. I'll also explain the kinetic chemistry of why it works so well. And in the second half of this essay, I'll explain how I progressed from this improvised apparatus to installing a complete soda fountain in my home."
- The Easiest Way to Get Rid of the Musty Smell Coming From Your Car's AClifehacker.com The Easiest Way to Get Rid of the Musty Smell Coming From Your Car's AC
Staying cool in your car shouldn't mean putting up with that odor.

When the weather gets hot, and you switch on the air conditioning in your car, you may find that in addition to the cool breeze, you’re also hit with a strong, musty smell. Fortunately, banishing that odor is a relatively straightforward task. Here’s what to know. Why your car’s air conditioning smells musty
So where is this musty odor coming from?
“What you’re probably smelling is the condensation that comes from the evaporator inside your heating and cooling system,” says Jake Fisher, Consumer Reports’ senior director of auto testing. “Basically, water collects in that area and, if it sits long enough, creates the musty smell.”
The stench may also be coming from built-up dust and bacteria in your cabin air filter. How to get rid of the musty smell
Here’s how to take care of that musty odor, according to automotive experts at Consumer Reports:
Open the windows of the vehicle. Switch on the car’s interior fan, and put it on the low setting. Remove your cabin air filter. Spray Lysol or another type of household or automotive disinfectant into both sides of the air intake vent, which is located at the base of your car’s windshield, where the wipers are attached. Leave the fan running and keep the windows open. This will give the disinfectant a chance to kill the bacteria causing the musty odor. Take a look at your cabin air filter before you put it back in. If it looks dirty or dusty, this would be a good time to replace it with a new one. This previous Lifehacker post walks you through that process.
Once your vents are clean, you can help prevent the moisture from coming back by switching the AC off for the last few minutes of your trip, and turning the fan on instead.
- Avoid These 3 Mistakes When Washing Whiteslifehacker.com Avoid These Three Mistakes When Washing Whites
Keep in mind that white fabric is dyed that color.

Home decor color trends come and go, but classic white linens—like bedding, towels, and tablecloths—never go out of style. Sure, being a neutral color helps, but there’s a certain comfort that comes from being able to look at white bedsheets or a washcloth and immediately know whether they’re clean.
Unfortunately, getting to that point is easier said than done. Here are three mistakes to avoid when washing whites. Don’t make these mistakes when washing white linens
With more than 20 years of industry experience, Wayne “The StainMaster” Edelman, CEO of Meurice Garment Care, has successfully tackled the toughest of stains, and is a whiz at washing whites. Below are three common laundry mistakes, and his tips for dealing with them:
- Thinking white is the absence of color
First things first: White isn’t the absence of color—it is a color. “Most think that fabrics are white at their core,” says Edelman. “But white textiles are dyed white, and fade like any other color.” 2. Using chlorine-based bleach
One of the first things people learn about doing laundry is that bleach is the most effective way to get whites sparkling clean. But bleach can cause the fibers in the fabric to deteriorate, and while it does remove stains, it can also leave your laundry more yellow than white.
“The best way to brighten and restore stained and darkened white linens or towels is to soak them in warm water [and] laundry detergent, and use a sodium-based bleach like OxyClean,” Edelman says. 3. Missing clear stains
Not all stains show up right away on white linens. “Clear stains like sunscreen, white wine, and glue, may not always be seen on your white furnishes or towels, but they, in fact, are sugar stains and will caramelize overtime,” Edelman explains. This is why a napkin or towel may be white after you wash it and put it away, then look yellow when you pull it out next.
To prevent this from happening, Edelman says that you should always pre-soak or treat white linens if you know something was spilled on them—even if you can’t see the stains.
- Stop Making Strawberry Jam and Make Vinegar Insteadlifehacker.com Stop Making Strawberry Jam and Make Vinegar Instead
Making it yourself means you’ll have an endless supply.
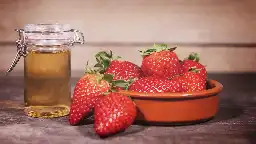
Once a year, everyone I know becomes a farmer. They plan ahead, pack a picnic, grab a hat and head to a farm to pick strawberries. Flats fill up with the sweet fruit you don’t eat in the field, people gain a little appreciation for farm workers after spending the day hunched over, and we all end up making big berry plans and dreaming sweet berry dreams. Mostly though, people go home, gorge on fresh berries and/or make jam.
I don’t know who eats all that jam, and I hate giving away jars, so I have a raft of ideas for what to make instead, starting with my very popular strawberry vinegar. I’m going to offer two ways to make it—beginner and advanced. Vinegar-making tools for your vinegar-making needs:
A vinegar mommy, to make it truly from scratch: Supreme Red Wine Mother of Vinegar A big ol’ carboy, with an air lock: FastRack 1-gallon Jug with Twin bubble Airlock Spoilage-preventing tablets: Campden Tablets
Why is strawberry vinegar such a good idea? You use more vinegar than you think. There’s salad dressing, sure, and marinades, but brightness is a thing your cooking could use more of, and flavored vinegars (good ones) are expensive, so they don’t see as much use as they should. Making it yourself means you’ll have an endless supply, and can afford to pop a little into your soy sauce, add a little to your gazpacho for some sweetness, or toss a bit with your grilled veggies for an instant brightness that illuminates the Maillard effect on the vegetables. You can also use it to add a tangy sweetness to all your potato salads or coleslaw. Next time you sauté some vegetables on the stove, give it a splash of vinegar to make the flavor brighter. Point is, when you’re not thinking about how expensive the pretty bottle was, you’ll find a lot more uses for flavored vinegar in your kitchen. Quick strawberry vinegar Ingredients:
1 quart of apple cider vinegar 1 pint of very ripe strawberries 1 teaspoon of sugar
Destem the strawberries, and add everything to a blender. Blend for 30-45 seconds (or more), as needed to get the mixture as blended as your blender will allow. Allow the mixture to sit for 6 hours, then pour it through a sieve or strainer into a bowl. Bottle it, and it should be shelf stable, because of the acid content.
This process produces a vinegar that has a distinct strawberry flavor, but still has the sharpness of the cider vinegar, which is softened a little by the sugar. All we’re doing here is flavoring the apple cider vinegar, instead of making real strawberry vinegar, which I’ll explain how to do below. Strawberry vinegar, the long way Ingredients:
3 pounds of strawberries 2 pounds of honey 1 quart of water 1 package of wine yeast (You can use any yeast you like, sometimes I use champagne yeast, sometimes I use sour beer yeast, but this is not bread yeast, to be clear.) 1 vinegar mother 1/2 campden tablet 1 gallon carboy or jug, with airlock
In this case, you’re making strawberry wine, then letting that wine turn to vinegar. To start, you’re going to take clean, de-stemmed strawberries and put them into a heavy stockpot, with the honey and the water. Let it come to a boil, then simmer for 20 minutes. You want to ensure the honey is dissolved. The strawberries will break down, but they don’t have to do so entirely. Let the mixture cool down to room temperature, then crush your ½ campden tablet with the back of a spoon or a mortar and pestle, and add it to the mixture. Give it a good stir, cover it, and walk away for 24 hours.
When you return, you’ll pitch your yeast into the mixture. Simply open the package and sprinkle the yeast on the top. Give it five minutes, then mix it in. Now it’s time to get this into your carboy so it can ferment. Use a funnel to pour it into the clean carboy, then fasten your airlock on top of it. Set it in a dark and cool space. Within a few days, you’ll see it bubbling, causing the airlock to burp. This will continue for a few days or up to a week. You want to wait for it to stop bubbling entirely.
If you have a refractometer or a way to measure ABV, now is a good time to check that yours is under 10%, but if you don’t, that’s ok, too. You’re usually in the right range.
Remove the airlock and add your vinegar mother, then place some cheesecloth on top of the jug, and tie it onto the top. This is so the wine is exposed to air, but bugs can’t get in. Let the wine sit for 3-4 weeks, then give it a taste. You can continue to let it age this way, mellowing out and evaporating along the way. The longer you age it, the better it will taste. I usually let mine sit for about three months.
Now, you can use it as you’d like, decanting it a little at a time. Making it from scratch is riskier, it could go south because fermentation is risky and this has a lot of steps. If you start to see green or blue mold, it’s gone bad. If you see white mold, that’s just Kahm yeast, which isn’t a problem but doesn’t taste great, so you need to strain, boil and restart from where you left off (boiling gets rid of all yeast, so you’d need to add it back in). But its also a mostly hands off process that is so deeply rewarding, and results, if you do it right, in a far more delicious and smooth vinegar in the end.
Also, let’s be honest, you were never really serious about making strawberry ice cream.
- How to Change the Gender on Your Driver's Licenselifehacker.com How to Change the Gender on Your Driver's License
Everyone deserves to have an identity document that reflects who they are.

You carry your ID with you wherever you go. It’s only right that your primary identity document reflects your gender identity. Well, as best an ID can—it’s not always easy or accurate to sum an individual up in an “F,” “M,” or a gender-neutral “X.” And for many transgender individuals, their gender is not actually whatever box they checked when they received their license as a teenager.
The more accurate someone’s gender marker is to how they identify, the easier it is for individuals to gain access to (and feel safe in) public spaces. A growing number of states are accommodating their nonbinary, transgender, and gender-nonconforming residents—nearly half of the country now allows people to select an “X” gender designation for their driver’s licenses. Still, a majority of states still do not have a non-binary option. On top of that, many states unfortunately make updating the gender marker on your license far more challenging than it should be. If you’re transgender and looking to update your ID, here’s what to know about changing your gender marker on your driver’s license.
State-by-state policies
Every state has different rules and processes for updating gender on a driver’s license. One thing that most states have in common is you must be at least 18 years old to legally changing your gender on legal documents like a driver’s license.
This map from the Movement Advancement Project shows which states allow residents to mark M, F, or X on their driver’s license, color-coded by how clear and easy the state’s policies are for actually making those gender marker changes.
Here are all the states that currently allow residents to select an “X” gender marker on their driver’s licenses:
-
Arkansas
-
California
-
Colorado
-
Connecticut
-
District of Columbia
-
Hawaii
-
Maine
-
Maryland
-
Massachusetts
-
Michigan
-
Minnesota
-
Nevada
-
New Hampshire
-
New Jersey
-
New Mexico
-
New York
-
Oregon
-
Pennsylvania
-
Rhode Island
-
Vermont
-
Virginia
-
Washington
While the following states don’t provide a gender-neutral or nonbinary option, they do allow gender marker changes on driver’s licenses, but only with proof of surgery, court order, or an altered birth certificate:
-
Georgia
-
Guam (U.S. Territory)
-
Iowa
-
Kentucky
-
Louisiana
-
Northern Mariana Islands (U.S. Territory)
-
South Carolina
-
Tennessee
-
Texas
If you live in a state not listed above, it may have an unclear, unknown, or unwritten policy regarding gender marker changes. There may be no court order or proof of surgery required, but still has burdensome process requirements that vary wildly. When you check out this map, be sure to click on your home state to read more about what its specific requirements look like.
How to prepare to change your gender marker
While each state has a different set of requirements, let’s look at New York’s process as an example of what someone should do to prepare for changing their gender marker on their driver’s license.
For making any changes to your driver’s license, you’ll need the DMV basics: Social Security Card (more on that below) and proof of your identity using a current government issued photo ID. There’s also a DMV-specific application for Permit, Driver License or Non-Driver ID Card.
According to the Sylvia Rivera Law Project, one of the most important things you might need to change your gender marker is a doctor’s letter affirming or attesting to your gender transition. This letter should have as clear and direct language as possible about what your gender marker should say. What’s more, once you acquire this letter, the law project recommends making physical copies: Some governmental agencies may take and keep your letter for their records.
Finally, if you’re changing your gender marker on your driver’s license, you’ll need to change it across all your legal documents, in order to avoid the pain of mismatch errors down the line. Social Security is one of the first documents you should update, as that will make it easier to then go about confirming your gender for your passport and driver’s license and so on. Here’s the official Social Security guide to updating your gender on record.
For many transgender individuals, legal documents have a resounding impact in ways big and small. Whether it’s how you’re being addressed in your junk mail, to how you’re treated by TSA, to how the bouncer at your favorite bar checks your ID—you deserve to move through the world as safely and true to yourself as possible.
-
- LPT: Drill small holes in the bottom of your trash can to make the bags easier to pull out
Take the smallest pilot hole drillbit you have (1/16" or 1mm) and drill 5-8 holes in the bottom of your trash can. This not only allows the air to escape as the bag fills up, but also makes it easier to remove the trash bag later.
I've done this with two trash cans now and recommend it to everyone.
- Bookmark shortcuts
I just figured this out and it is so convenient. I will show by example. I am using Firefox, but other browsers might work the same way.
(1) Go to lemmy.ml
(2) Ctrl+D, then enter to save as a bookmark
(3) Ctrl+shift+O to open the bookmark settings
(4) Select the lemmy bookmark that you just created
(5) At the bottom of the menu, you can set a Keyword. Write the letter "l".
(6) Close the menu
You can now type "Ctrl+L" to jump to the navigation bar, then type "l", enter.
You can create single or few-letter keywords for the sites that you visit often.
Bonus related tip: In the browser preferences, under "search", you can define a keword for specific search engines. For example, if you set wikipedia to "@w", you can then search directly from the navigation bar by typing "@w whatever"
- tui tip hold shift
hold shift in ncurses tui programs to drag select text with the mouse cursor
- Why refrigerators spontaneously explode and how to prevent it.web.archive.org Exploding Refrigerator? A Hidden Home Hazard—and Why It Happens
A potential disaster is lurking in your kitchen: the refrigerator. Here's how a fridge can explode—and what you can do to reduce your chances of catastrophe
While refrigerator explosions are still rare enough that their frequency is unknown, Neil Everitt, former editor at air-conditioning and refrigeration magazine ACR News, dubs these occurrences as "ignored disasters" and views fridges as one of the most dangerous appliances in a home. The reason: While a fire caused by a stove or other appliance is usually preceded by smoke or a beeping alarm, fridge explosions happen spontaneously and without warning, leaving residents unprepared.
how can it all go wrong? Sometimes, as the gas refrigerant moves through the compressor, the back of a fridge can get extremely hot. This causes the compressor's coils to contract, and the gas can become trapped. If this highly flammable gas is not able to properly vent it builds up and can eventually burst through its enclosure.
Most modern refrigerators are now backed with metal that includes a heat shield to prevent fires, but older or cheaper models may use a plastic backing. The plastic is highly flammable and, if ignited, can cause fires that develop quickly and powerfully while giving off toxic gas.
if your fridge makes a choppy sound or, even worse, no noise at all, the coils could be clogged. “The easiest way to save your refrigerator is to clean the condenser coils,”
Cleaning coils: https://youtube.com/watch?v=h0ytzetkjGQ
- incubation and rest
when under pressure to take in large quantities of information, taking breaks for reflection and review is probably more productive than not stopping to take breaks.
- skip automated menusgethuman.com GetHuman: Call Companies and Fix Customer Service Issues Faster
Phone numbers for companies and tools for avoiding waiting on hold, other contact information like live chat, tips, secrets, and ways to solve customer service problems faster and easier than ever.

rush past automated menus and speak to someone who can help you
- sleep tip: writing
write down tasks or anxiety on your mind before you go to sleep. forget about them and then pick them up in the morning.
- reddit advanced search
reddit allows you to combine their special search fields. see: https://www.reddit.com/wiki/search example: https://old.reddit.com/search?q=subreddit%3Alinux+site%3Agithub.com
- no stick baking
when baking wet dough.. it often sticks to the pan. you can avoid this by placing it on top of a piece of sandwich bread. cook til toast (7-9 min). then remove the toast and enjoy. the dough can then sit on the pan and continue to cook without sticking. otherwise.. just use flour or cornstarch to coat the surface of dough and pan.